How to Manage Orders in Magento 2
Nicole Dean
Nicole Dean
Order management is an important step that allows businesses to run smoothly and keeps customers happy. By keeping your customers happy, there is a higher chance that they will visit your site in the future. The more successful your site becomes, the more orders you will have. Therefore, understanding the order functionality within Magento is important to becoming successful within a Magento website.
When a customer completes the order process on your website, you will receive a “new order” notification email. From there, you’re going to want to look at your orders to go over the information on the order.
VIEWING ORDERS IN MAGENTO
Step 1:
To access your orders, you first want to log in to your Magento Admin Panel. That will bring you to your Magento Dashboard.

Step 2:
Go to Sales on the left-hand side menu and click on Orders from the pop out menu.

Your Orders page displays the list of all of the orders placed in the store. You can sort them by status in the right column (to the left of “Action”). If you want to bulk update or just view all of your pending or processing orders, you can find them quickly and easily.
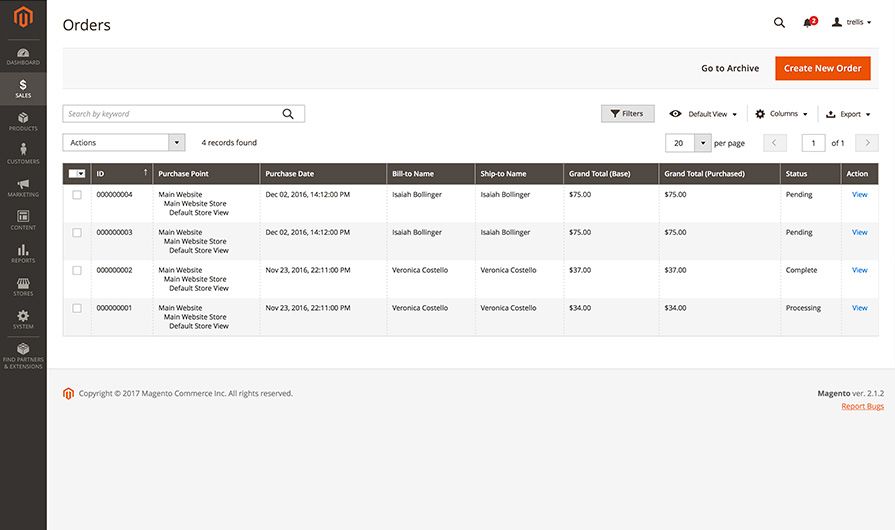
You can also do actions such as hold, cancel, or print packing slips for an order. There is also the ability to export orders via CSV in the top right of order section if you want to see all your order information in an excel sheet.
The first order will come in as 0000000001 and goes to 0000000002 and up from there. This makes it easy to figure out how many orders you have received in Magento.
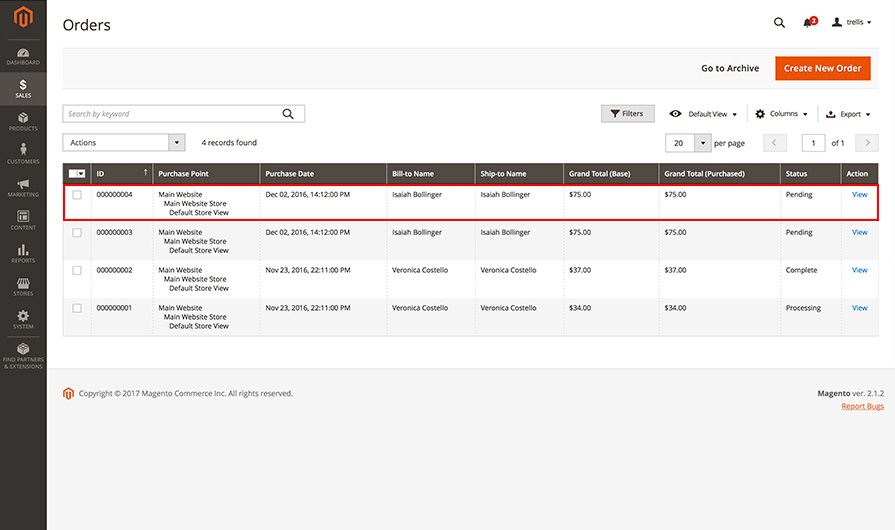
Step 3:
To view more information about a particular order, simply click on that order.
Step 4:
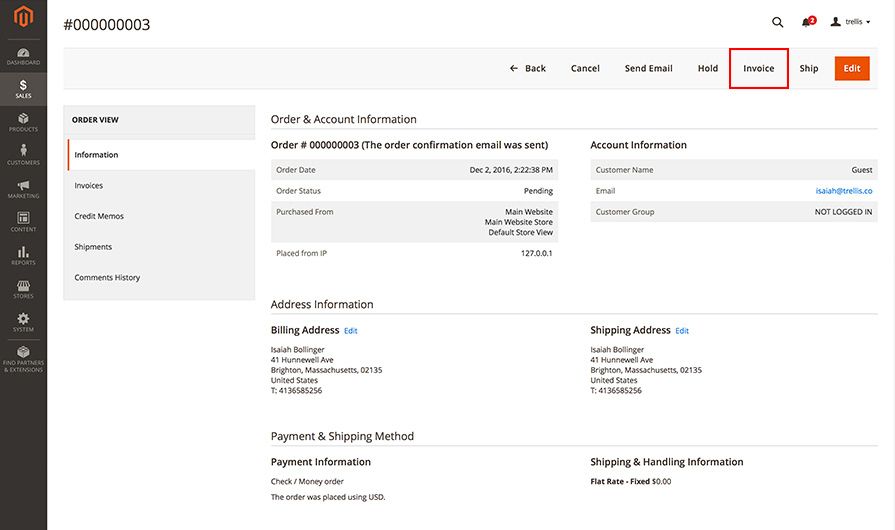
From there, the Order Form is displayed. There is a wealth of information about an order on this page. It displays information such as the account information and billing address of the customer, payment information, the status of the product and any comments on the order. From this page, you can see an e-mail confirmation has been sent to the customer regarding the product order.
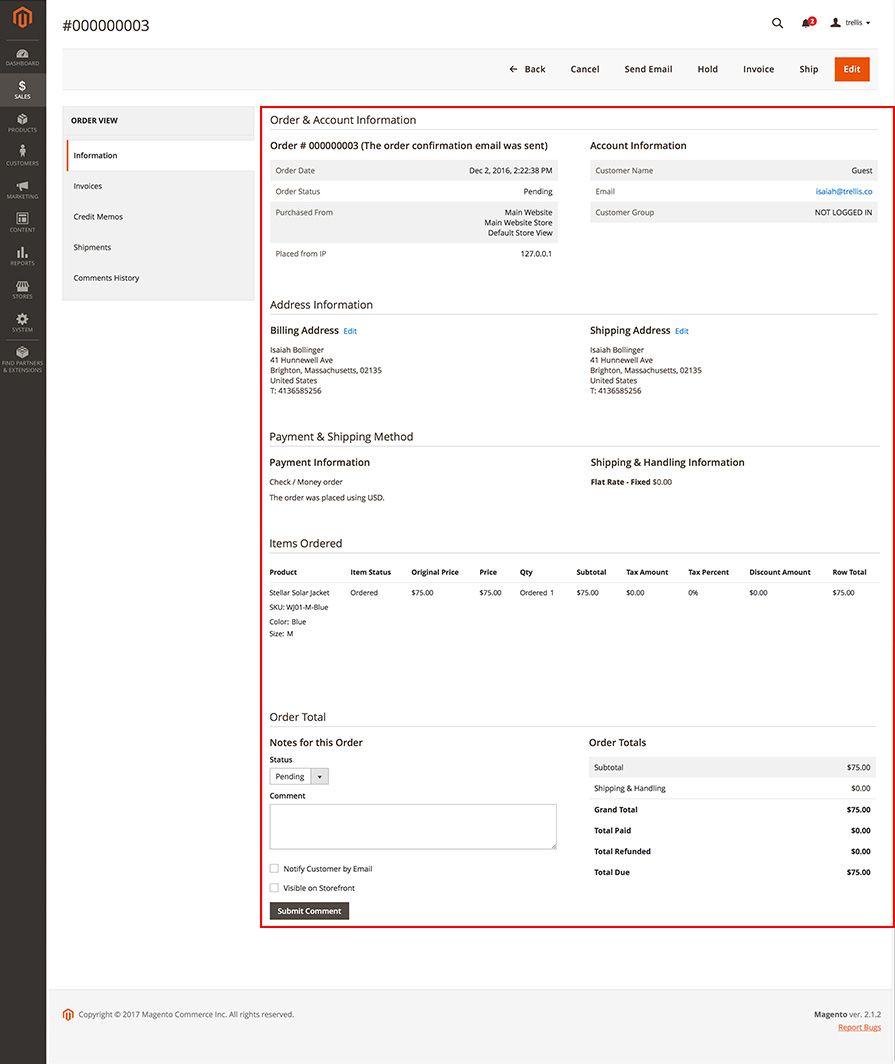
Order #:
Here you can see the order date, order status, and purchased from information. The purchased from information will tell you what website it was purchased with, from what store within the website it was purchased, and what store view it was purchased from. Remember you can create multiple websites, stores, and store views in the Magento System > Manage Stores area of the admin panel which is how you would create multiple websites, stores, and store views.
Account Information:
This will tell you the customer name, customer email and customer group of the person who made the order.
Billing Address:
This is simply the billing address of the person making the order. Notice you can edit the billing address in the order in case something needs to be changed.
Shipping Address:
The shipping address may very well be the same as the billing address and can also be edited in the order information section.
Payment Information:
Here you can see what type of payment method was used to place the order as well as the currency used to make the transaction.
Shipping & Handling Information:
This section tells you the cost of the shipping and handling fee and what shipping method was used such as freight, UPS, USPS, or flat rate.
Items Ordered:
This tells you the product name, SKU number, item status, original price, the price of the sale, qty. with order/invoiced/shipped, subtotal, tax amount, tax percentage, discount amount, and row total for each item that was ordered. This is the default information that is presented in the order because it is generally the most important information for the store owner. However, because Magento is open source and customizable, it is possible to customize the data that is presented here in Magento with programming knowledge.
Notes for the Order:
The notes section will tell you all the statutes of the order and any comments that were submitted to the customer during those status updates.
Order Totals:
Here is simply the subtotal, shipping & handling fee, grand total, total paid, total refunded, and total due. This gives you a quick summary of where the monetary side of the order is at.
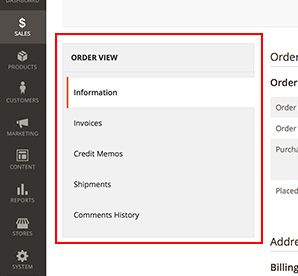
Invoices:
Here you can see the invoices associated with your order. You can also click on the invoice to see the individual invoices themselves.
Credit Memos:
Credit memos are basically the invoices associated with a refund. Therefore they alert the customer that their order has been refunded (credited). You can see your credit memos associated with each order just like invoices.
Shipments:
Here you can see all the shipments associated with you order. You can click on the shipment information to see the information in more detail.
Comments History:
The comments section will tell you all the statuses of the order and any comments that were submitted to the customer during those status updates.
CREATE AN INVOICE
Step 5:
To create an invoice for the order and alert the customer that the order has been accepted, click the Invoice button at the top of the page.
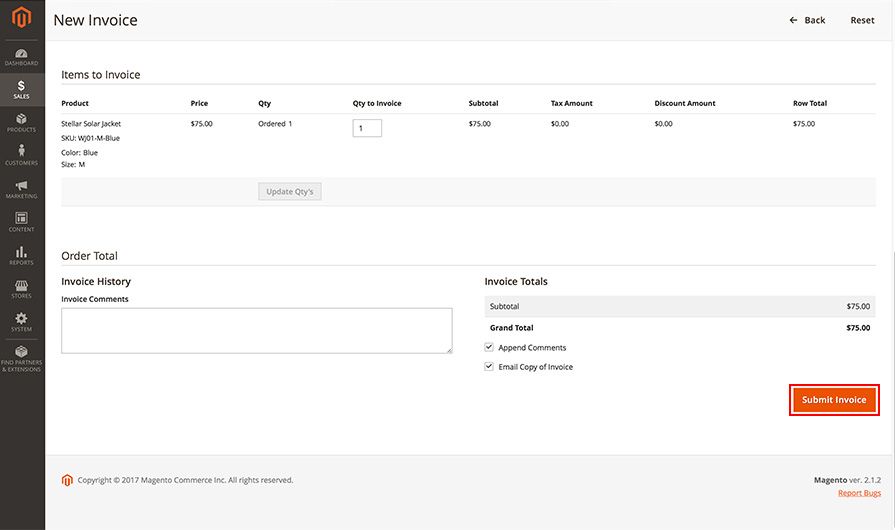
Step 6:
To alert the customer about the invoice, under Order Total, type your comments in the text area on the left and check off “Append Comments” and “Email Copy of Invoice” on the right. Next, click on the Submit Invoice button. Now, an order will get processed and will get accepted into the system.
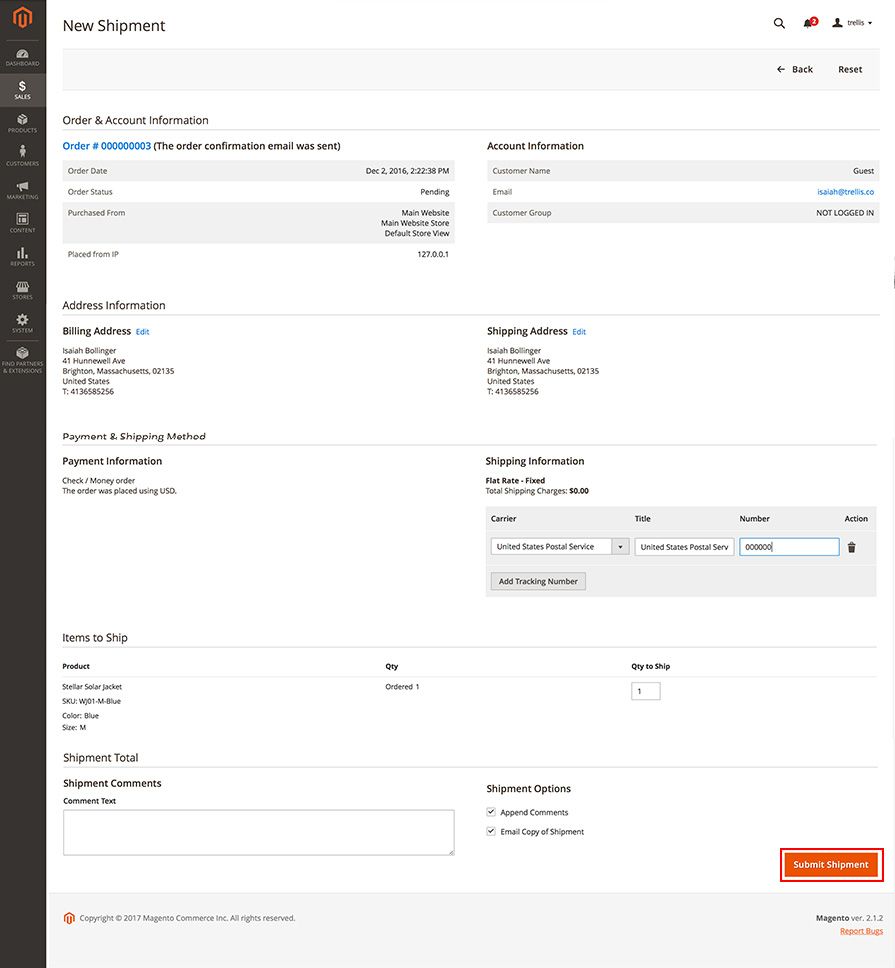
UPDATE THE ORDER AS SHIPPED
Step 7:
The product is now shipped and you need to update the customer on their order status. To do this, enter the completed order into the system and notify the customer regarding shipping of your product by clicking on the Ship button on the top of the order page.

Step 8:
The Shipping page displays things like the order and account information, the billing and shipping address, payment and shipping methods, and the items to be shipped.

Under the Shipping Information section, click on the Add Tracking Number button and choose your Carrier from the drop down menu.


Put the tracking number of your order and click on the Submit Shipment button. It will notify the customer regarding the status of the product shipping.
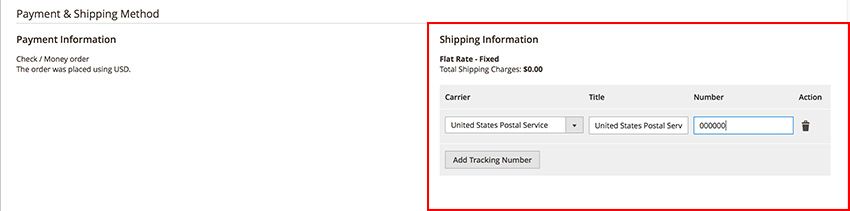
Type any comments you may want to tell the customer and then click on the Submit Shipment button to notify them.