How to Change Order Statuses in Magento
Nicole Dean
Nicole Dean
Magento uses Order States for processing orders internally and each order state can be assigned to multiple order statuses. Some people may not know the difference between an Order Status and an Order State.
An Order State is used to define the processing order.

An Order Status is used by the administrator to know the exact order flow.
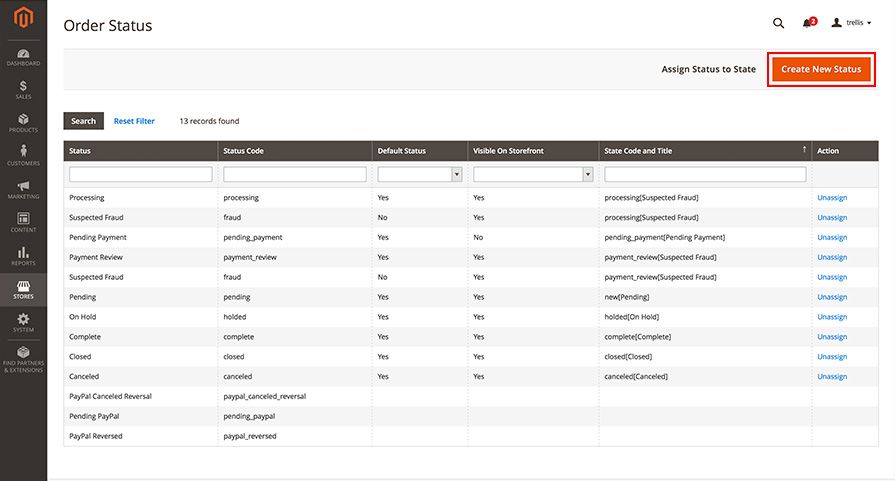
Default Order Statuses and Order States
- New Order = A new order has been made
- Pending Payment = Payment is pending but not received
- Processing = Payment is complete but order not shipped
- Complete = Order is shipped and payment has been made
- Canceled = A canceled order
- On Hold = An order on hold, not shipped
- Payment Review = Payment under review
- Closed = An order is closed
- Canceled
- Closed
- Complete
- Suspected Fraud
- On Hold
- Payment Review
- Paypal Canceled Reversal
- Paypal Reversed
- Pending
- Pending Payment
- Pending Paypal
- Processing
Keep in mind that with Magento 2.0, you can can’t manually change an order status. You can, however, specify that there are extensions or you can create custom functionality to do so.
Your order statuses are displayed in the Magento Admin Panel > Sales > Orders.

Your Orders Page displays the list of all of the orders placed in the store. You can sort them by status in the right column (to the left of “Action”). If you want to bulk update or just view all of your pending or processing orders, you can find them quickly and easily.

Create new Magento Order Status
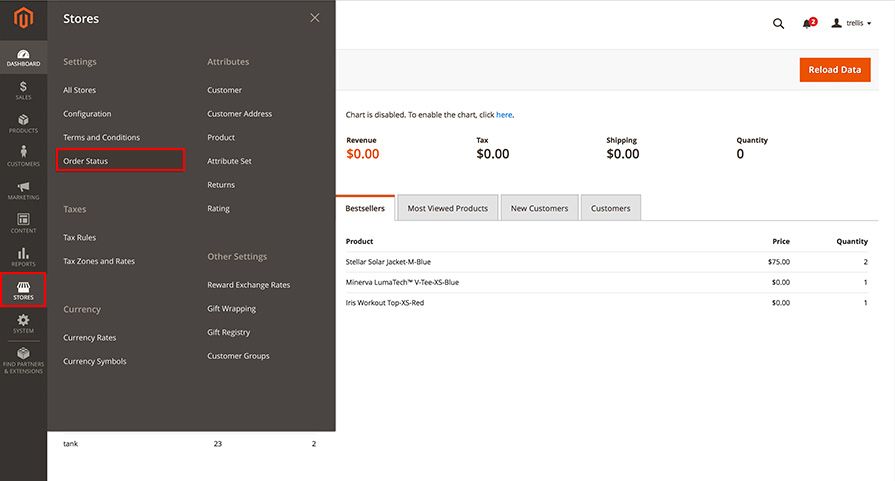
On your Magento Dashboard, go to stores > Settings > Order Status.
From this page, click the “Create New Status” button.
Now you will need to enter the Status Code. Your status code must include both letters and numbers. It is required that you begin your status with a letter and you must insert an underscore character in place of where spaces would normally go.
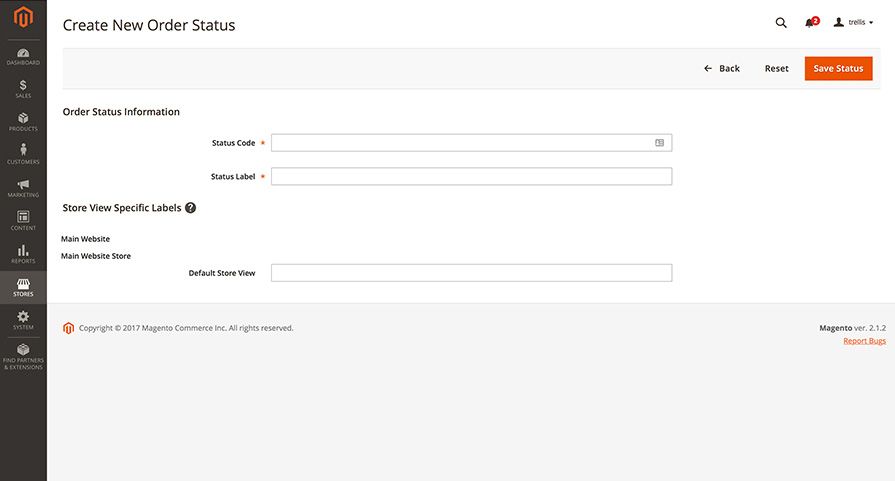
Enter the status label that is shown on your Dashboard and frontend of your store.
Under the “Store View Specific Label” section, if you have multiple stores, it is possible to set different labels for each store view.
When you’re done with that, save the status by clicking the “Save Status” button at the top of the page.
Assign Order Statuses or Order States
Back on the Order Status page, click on “Assign Status to Stage” next to the “Create New Order Status” button.
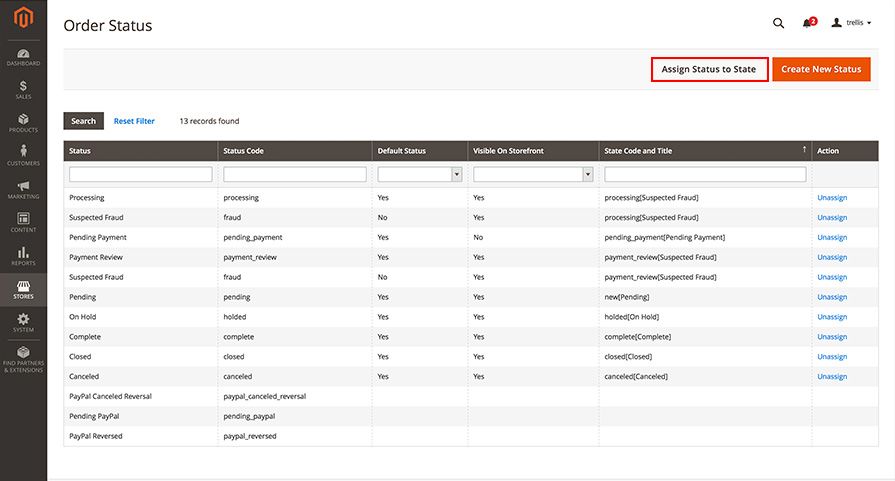
From the drop down menu in the Order Status field, choose the status that you want to assign.
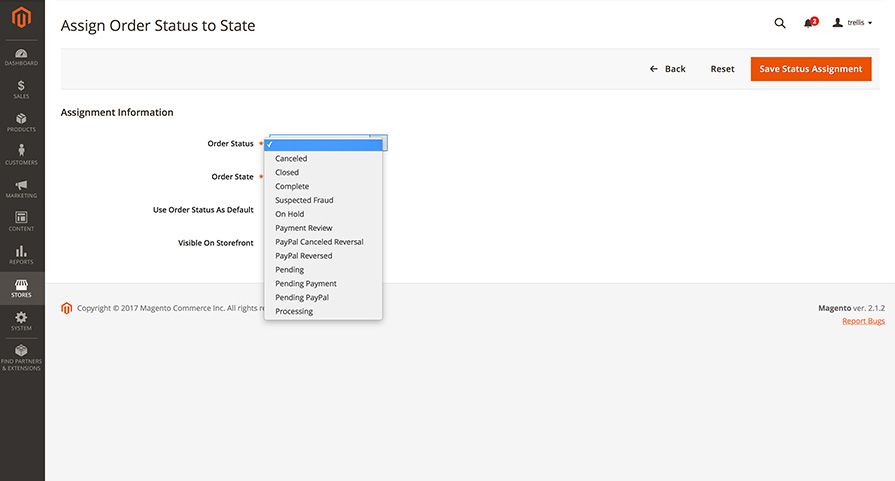
Next, set the Order State to the place in the workflow where the order status belongs.

Mark the “Use Order Status as Default” checkbox to apply this status as default for the order state. Mark the “Visible on Storefront” checkbox if you want to show this status on your Storefront.
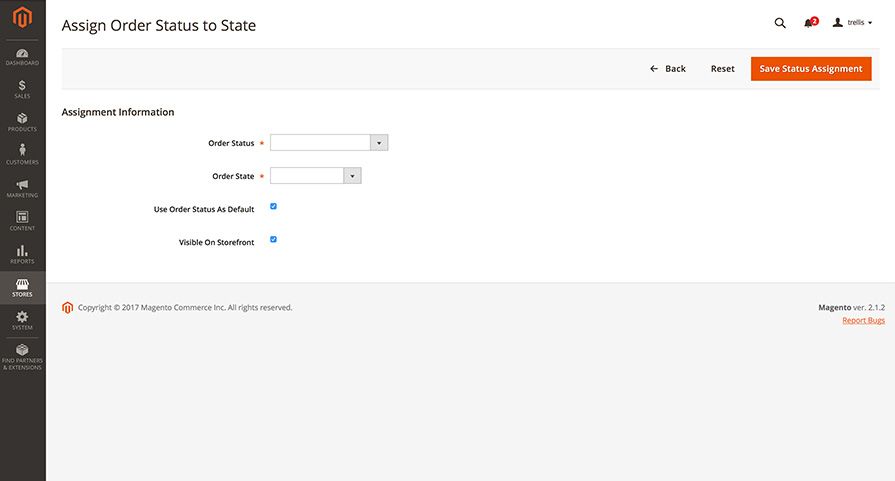
Once that is done, click on the “Save Status Assignment” button.
Edit Order Statuses
On the Order Status grid, click on the Order Status that you want to edit.
Change the order status settings as you need.

Click Save Status to save the edit.
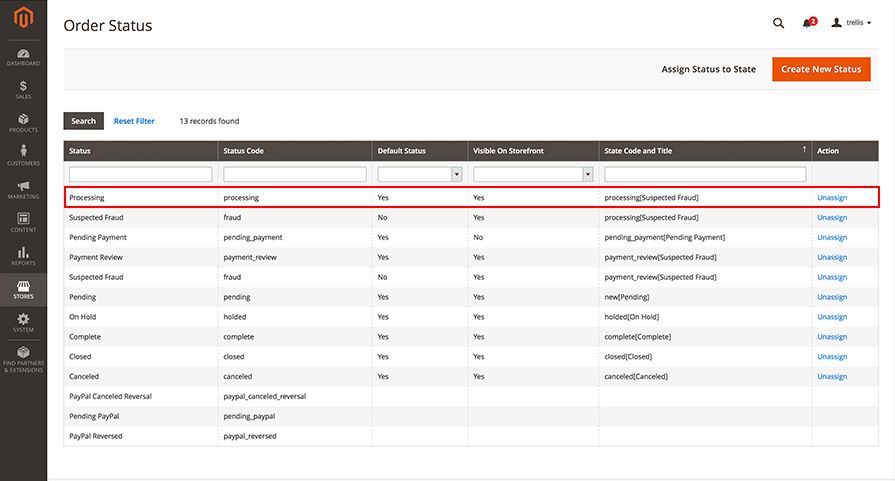
Remove Order Statuses from an Assigned State
Choose the Order Status you want to unassign on the Order Status grid and then click on Unassign link in the Action column.
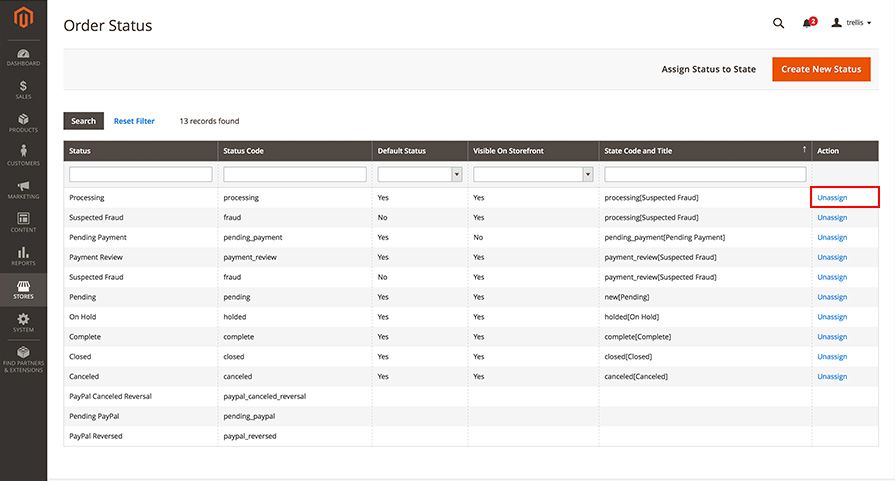
At the top of the workplace, a short message will display to notify that you have unassigned the order status. Please note that the unassigned status will still be included in the list.
Leave a Comment