How to Create CTAs in HubSpot
Nicole Dean
Nicole Dean
Calls to actions, or CTAs are extremely important. They’re more than just buttons on a page and they’re certainly not something you want to look over. Believe it or not, there’s an art to CTAs. The better looking the CTA and the more on-brand that it is, the more likely you’ll get clicks. That’s what a CTA is all about, right? Getting more clicks? Right!
Calls to actions are exactly what they sound like. They’re an action that you want your viewer to do. For example, “Click to Download Your eBook” or “Check Out Our Blog.”
When working with CTAs, you want to make sure they all look the same and are consistent throughout all platforms. That means on your website, your emails, your landing pages, etc., they all should look the same.
There are three ways to create CTAs in HubSpot. You can either “clone” a pre-existing CTA, create a brand new one, or create an image CTA.
This tutorial is going to show you how to do the first two options, cloning and make a new one!
To get started, go to HubSpot > Content > Calls to Action.
1. CLONE AN EXISTING CTA
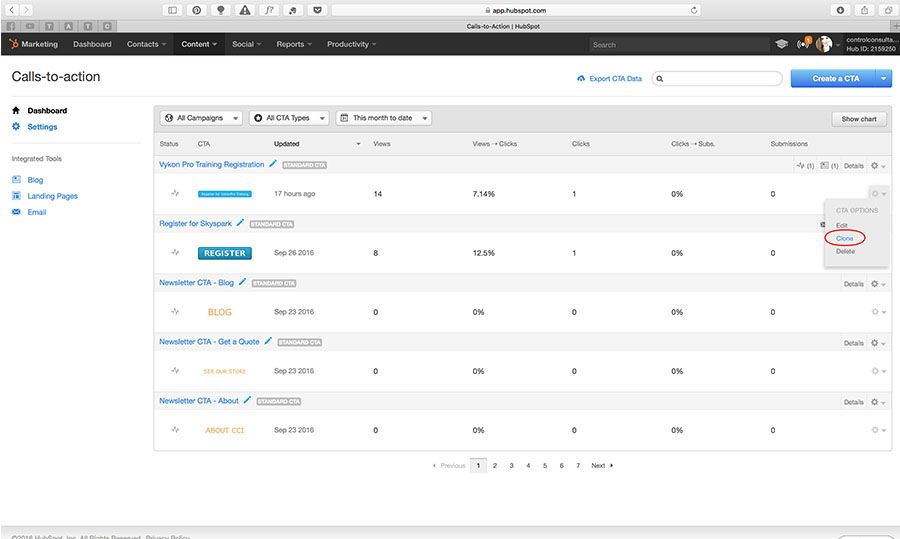
Once you get to the CTA page, you can choose the CTA that you would like to clone. To do so, go to the settings icon on the right of the CTA and hit “Clone.”
The great part about cloning a CTA is that everything is already done for you. All you have to do is change 3 things!
- CTA Name
- Link URL
- What you would like the CTA to say
Tip! Always make sure to check the “Open in new window” box so the viewer won’t be leaving your site from the same window.
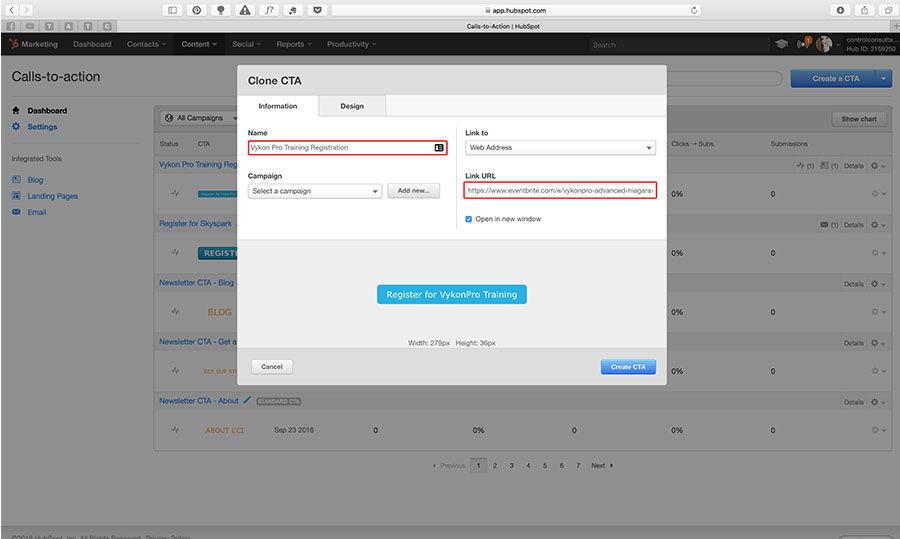
Once you go in and change the name and URL, you want to go into the Design tab and change the CTA text. Since you’re cloning a previously designed tab, the design of it is already done for you! Typically, if you just type in the new text, replacing the text already there, the pre-set font and size will stay the same. However, if you choose to copy and paste your new text into the text area, there’s a high chance the pre-set font and size will change. That being said, you simply just have to go into Style and change the font and font size. Once you’ve done that, hit “Create CTA” and you’re good to go!

Great job! Easy right?
2. CREATE A BRAND NEW CTA
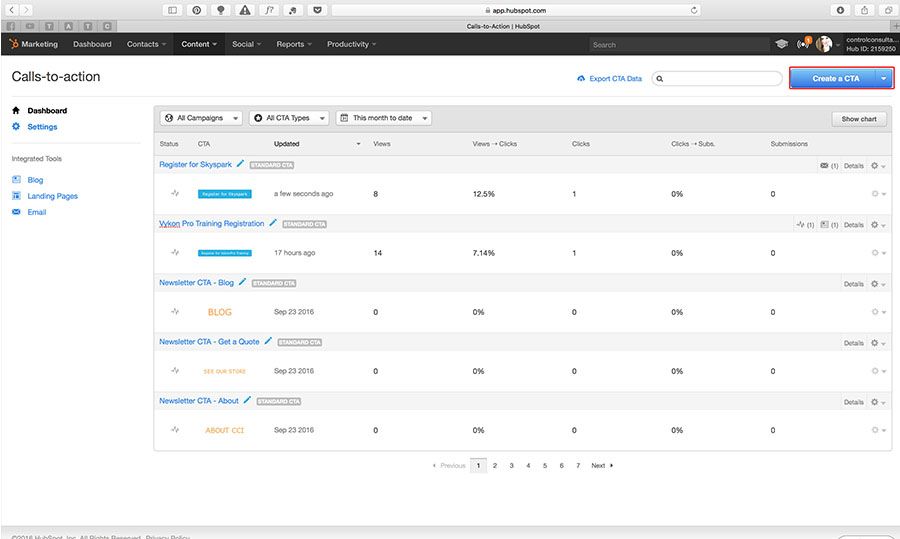
To create a brand new CTA, go to the CTA page and click “Create a CTA.”
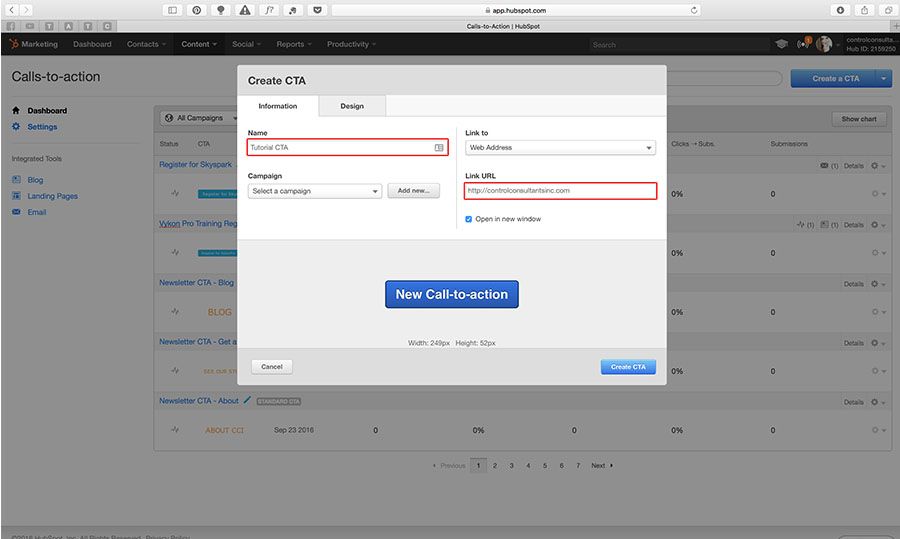
The next thing you want to do is name the CTA, add a URL. Keep in mind that when naming your CTA, it’s an internal same so only you and your team can see what it’s called. It’s a good idea to name it something specific, like, “Check Out Our Blog – Email” and “Download Your eBook – Thank You Page.” Don’t forget to check the “Open in new window” box!
Once that’s completed, you want to go into the Design tab and change the CTA background color. You can either enter the hex code or the RGB values.
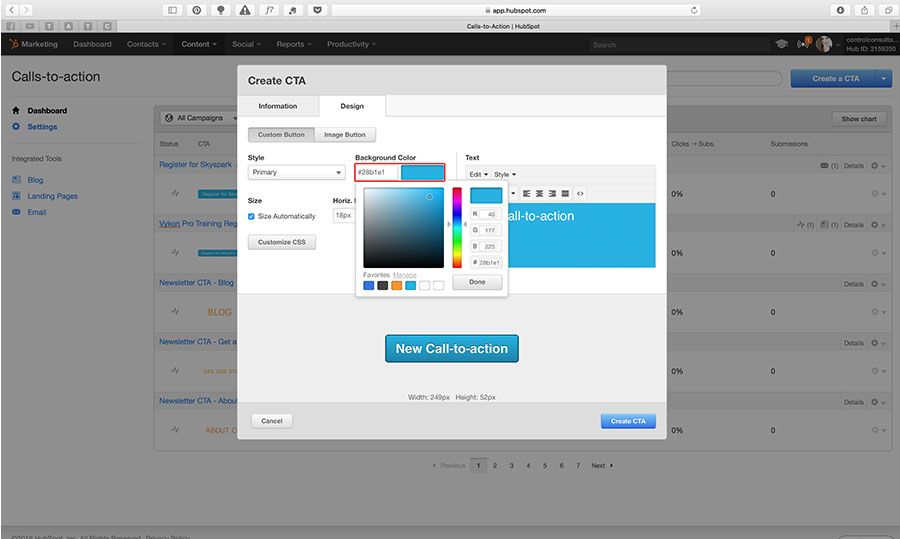
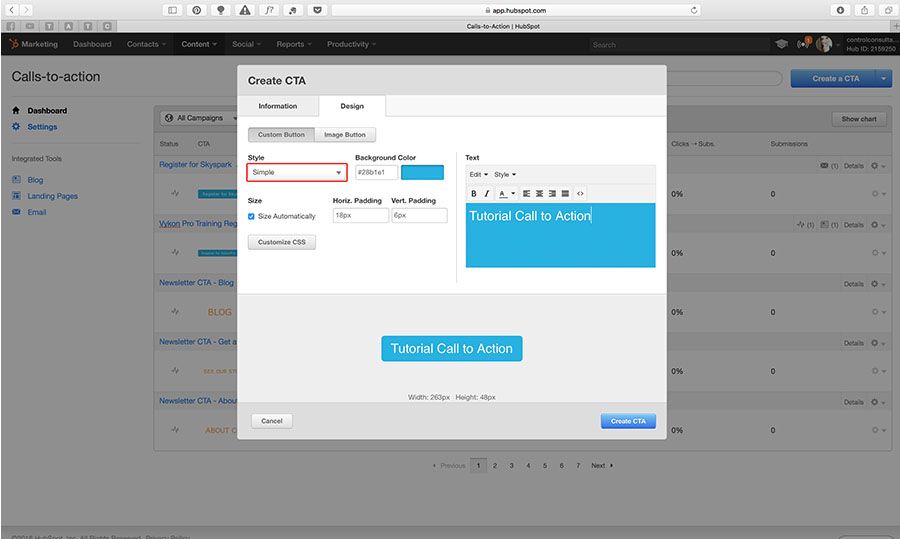
Next, you want to change the “style” of the CTA. Our number one go-to is simple. It looks great for our brand and also matches our client’s brand, as well. Take a minute to go through all of the different styles and choose the best one for your brand. Note that you can customize the CSS for it, as well, if you’re looking to do something specific.
Don’t worry about changing the size or the Horiz./Vert. Padding because they’re already pre-set for you.
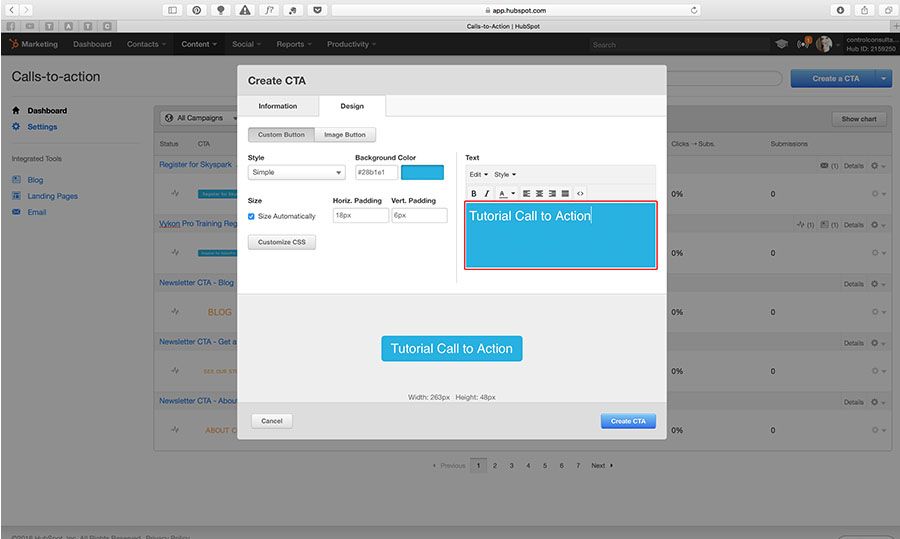
Next, you want to change the text. It’s important to be as clear and specific as possible with your CTAs. For example, instead of just putting
“Register,” put, “Register for __________”.
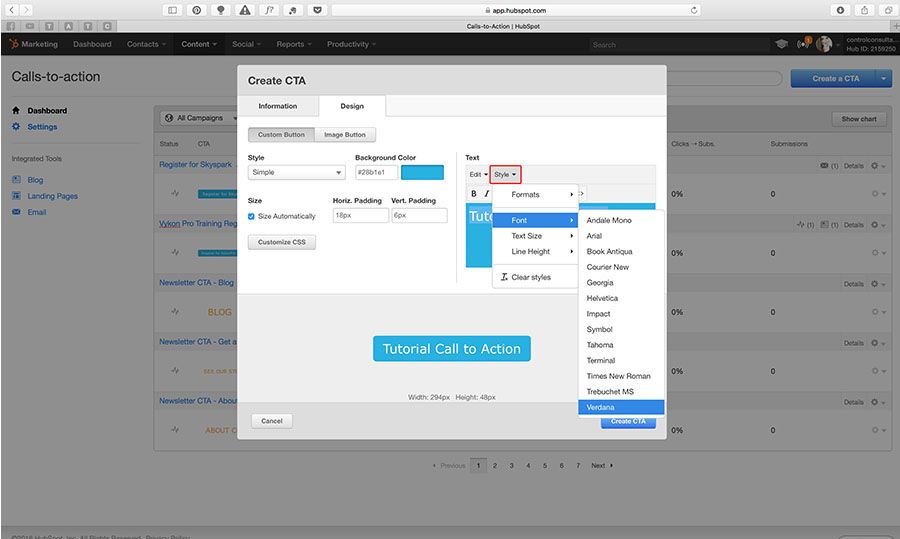
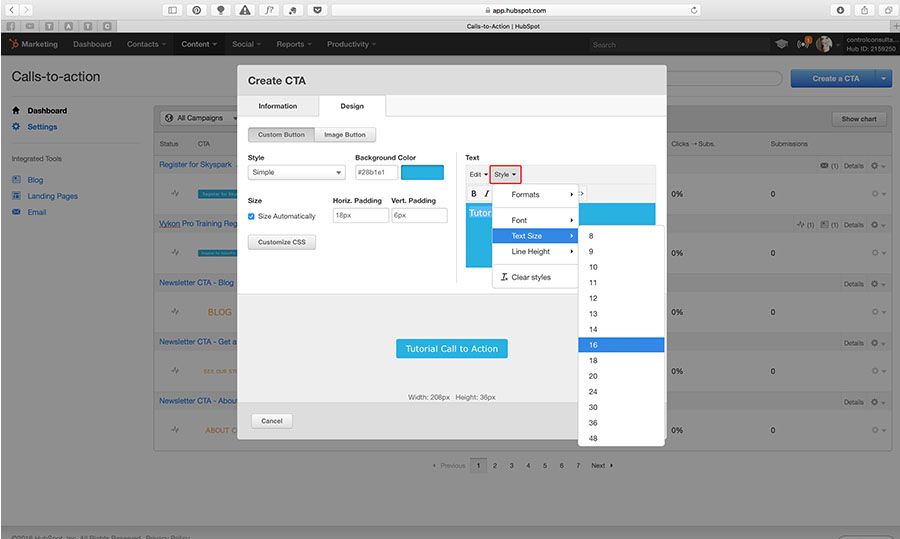
The next step is changing the font. Choose the best font that fits with your brand. There are fonts pre-set in HubSpot that may not be the exact font you want, but HubSpot gives you a great selection that can still look great on your site.
You’re almost done! The last step is changing the font size. Play around with the different font sizes to see what looks best.
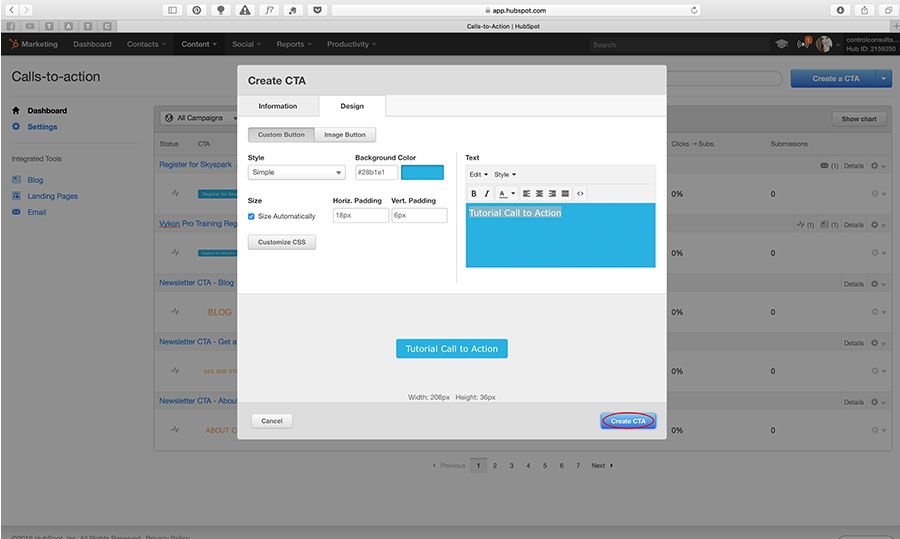
Alright, now click “Create CTA” and you’re all set! Congratulations, you’ve made your very own CTA from scratch! Give yourself a big pat on the back!
Leave a Comment