Getting Started with Google Places and Google Plus
Patrick Bean
Patrick Bean
Remarkably a high number of businesses fail to utilize Google Places and Google Plus and are completely missing out on all of the value that they provide. In fact only an estimated 16% of businesses worldwide have claimed their Google Places according to late 2011 numbers. I expect those numbers are much higher now in 2014, but still only a fraction of business that have claimed their Google Places are even utilizing their Google Plus account as well as making sure they are both connected properly. This blog post details how to do this the right way so that your Google Places account is connected to your Google Plus account.
1) Create a Google Account
Google has completely changed the way their services operate by offering an all in one Google account. Now with just one Google account you can access your Gmail, Google Plus profile, Google Places listing, Google Analytics, Google Web Master Tools, Google Drive, and all of the other Google products.
The first step towards creating a Google Plus and Google Places listing is to create your Google account that will be used for all of your Google services.
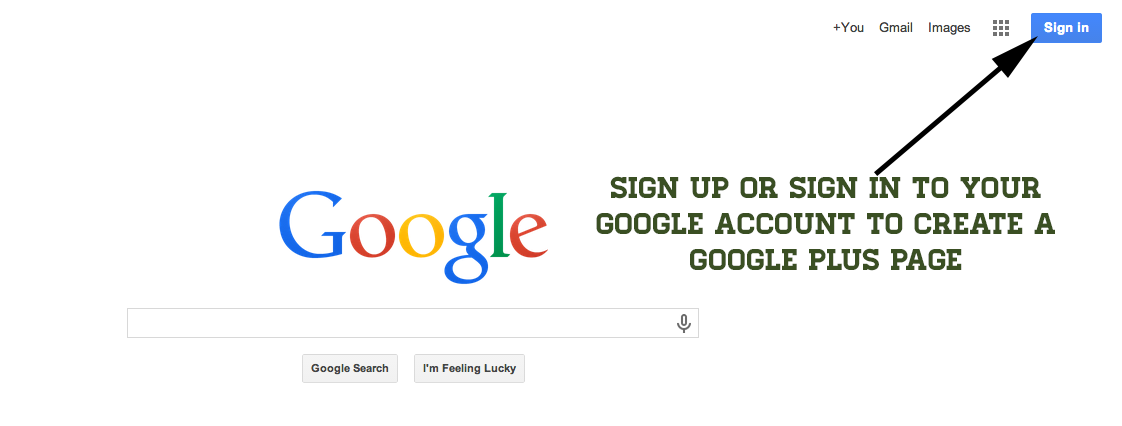
If you already have a Google account you can click sign in to select the account you would like to use for your Google Plus profile and Google Places listing. If you do not have one you can simply click “Sign Up” to begin the processs of creating your Google account.
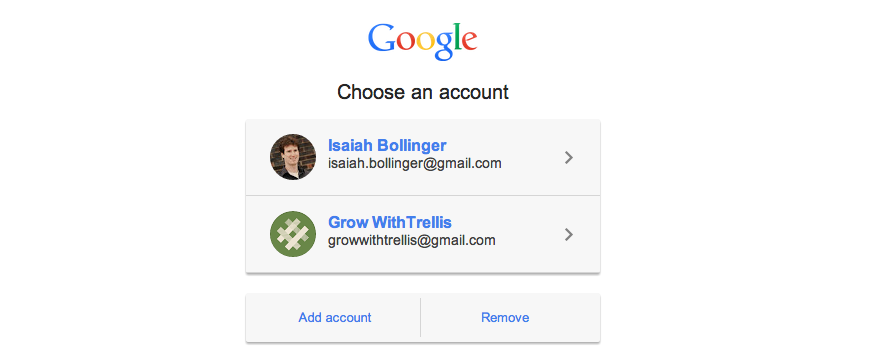
This tutorial will show you how to create a Google Plus page for your business, but you can also set up your personal Google Plus profile. I highly recommend spending the time to do so because of the push Google has made to personalize SEO. Using your personal Google Plus in tandem with your business Google Plus page will help you grow your business’ overall Google Plus Presence.
2) Create a Google Plus Local Business Page
The second step is to create a Google Plus local business page by hovering your mouse over the “Home” tab at the top left, and then clicking on “Pages” from the drop down menu that appears. 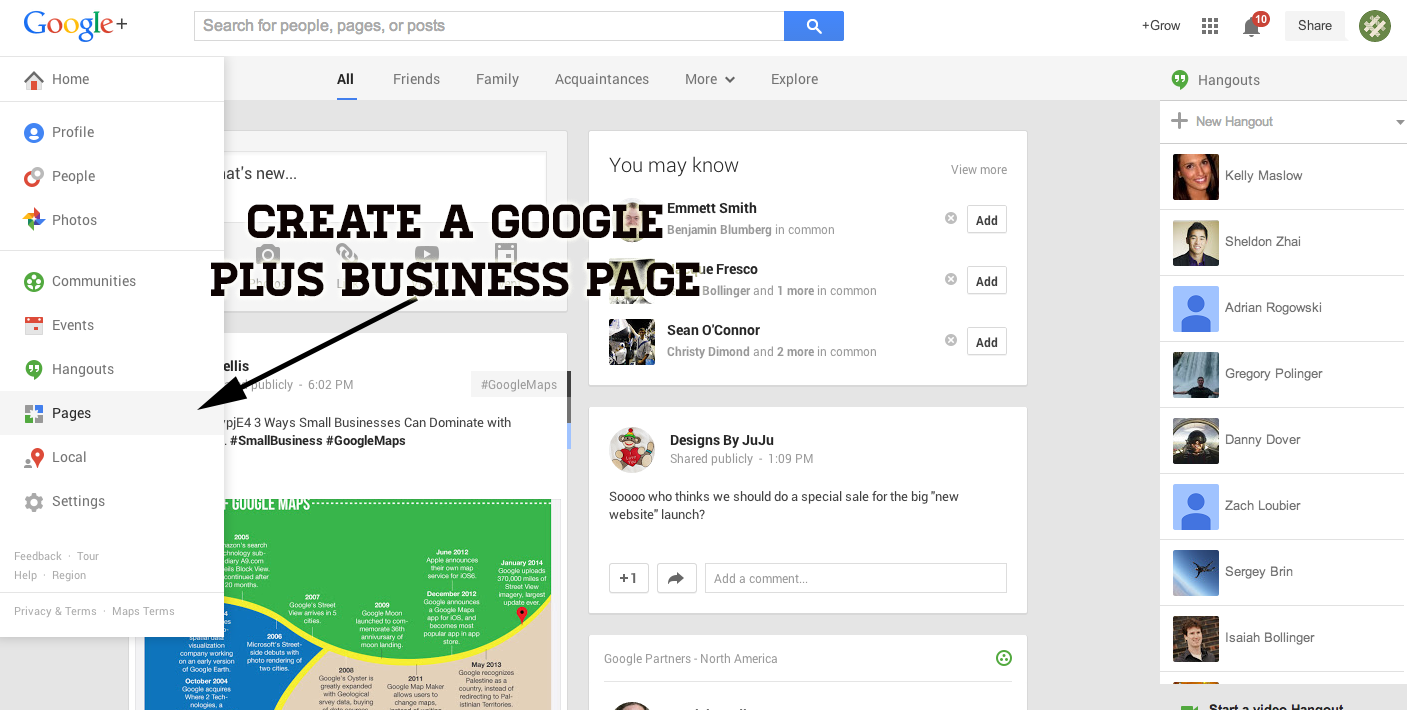
Then you will want to select which type of business page you would like to create. In order to link this Google Plus page with your Google Places listing you will need to select “Local Business or Place”.

3) Find or add your Business Info
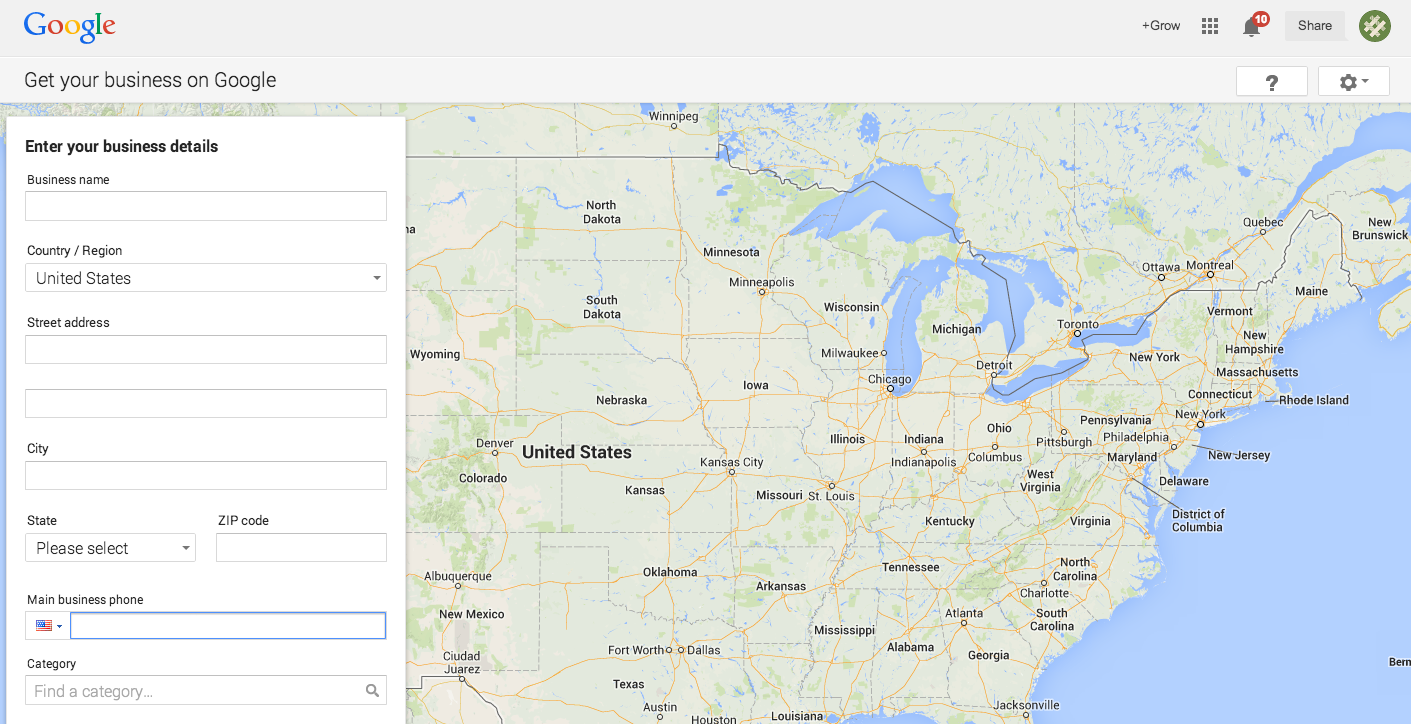
Once you have selected your page type you can now search for your business through Google’s database. If your business information exists you can select it from the list. If not you can select “No, these are not my businesses” to add your business to the list.
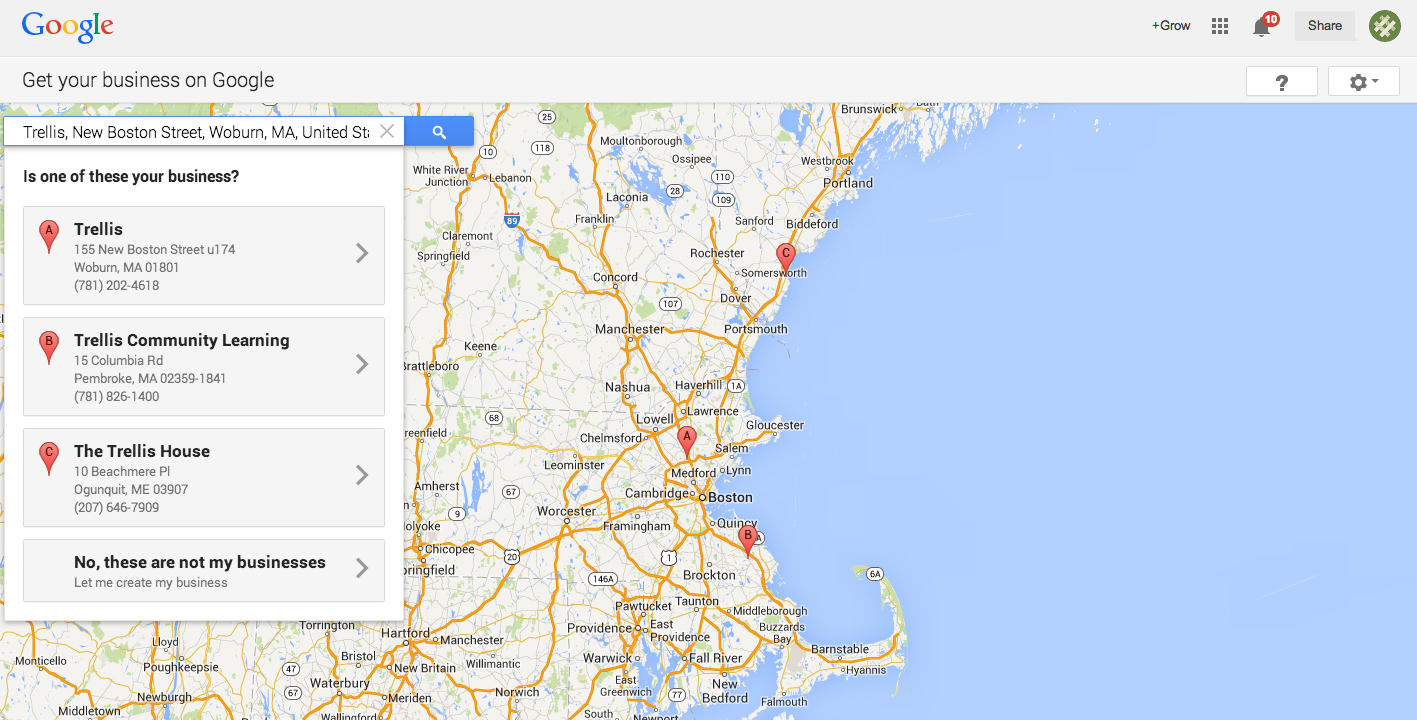
Make sure you choose the appropriate keywords and fill out all of the information thoroughly because Google Places and Google Plus business information have a strong influence on your local SEO search results.
4) Request A Pin Or Verify by Phone
Next you will be prompted to verify your business. If Google already had your business information you will most likely have the option to verify by phone in which Google will send out an automated phone call to the phone number listed for the business to provide you with a verification pin number. If you do not have the option to verifiy by phone or would prefer to have it sent in the mail you can select “Verify by post card” and Google will mail the pin number to you within two weeks. When you do receive the postcard you simply need to log back in to your account and enter the pin to verify your business. This can be done through Google Places or through Google Plus by hovering over “Home”, selecting “Pages” from the dropdown menu and selecting your Google Plus page.
In both scenarios you will have to enter in the pin number they give you to verify your business information and officially claim your Google Plus and Google Places. Until your information is verified the value of your Google Plus and Google Places information will be greatly diminished if non-existent within search results.
5) Complete your Google Plus Page Information
Once you have requested a PIN number or verified by phone you can go on to complete all of the Google Plus information for your business profile. There is a lot of information you can fill out such as additional links that you want connected to your page beyond the home page. These can be product or service page links or other important pages like the contact or about us page of your website. Make sure to add images, videos and anything else that might make your profile stand out from the competition. If your business has a website you will also want to make sure to add that url under “Contact Information”. This will allow you to verify your website, which is a very important step along with setting up Google Authorship. Check back soon for detailed instructions on how to complete both of those steps.
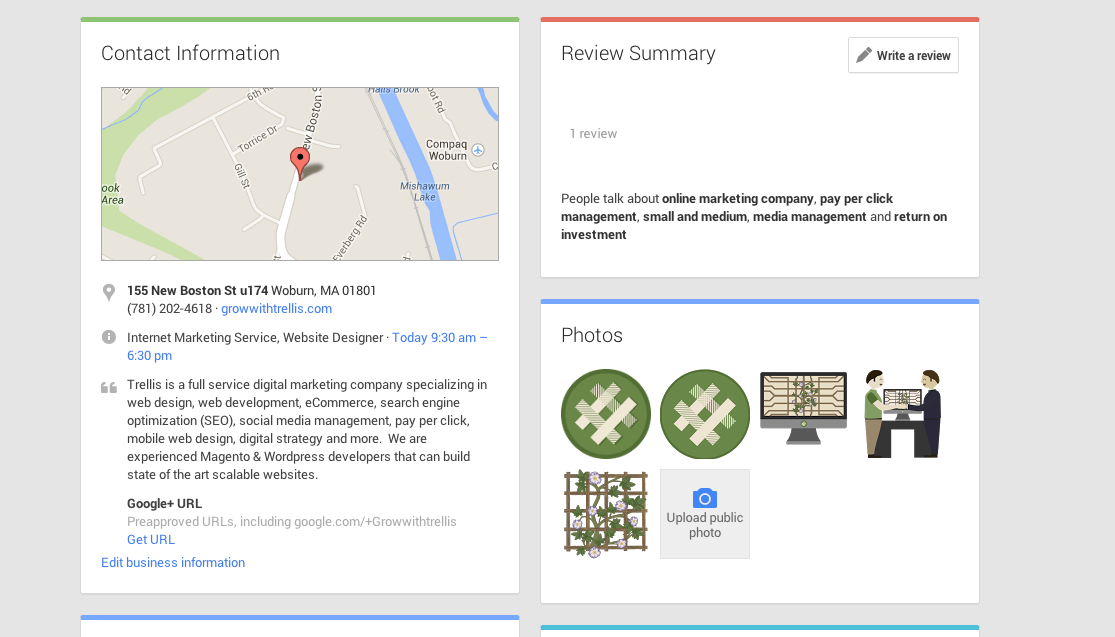
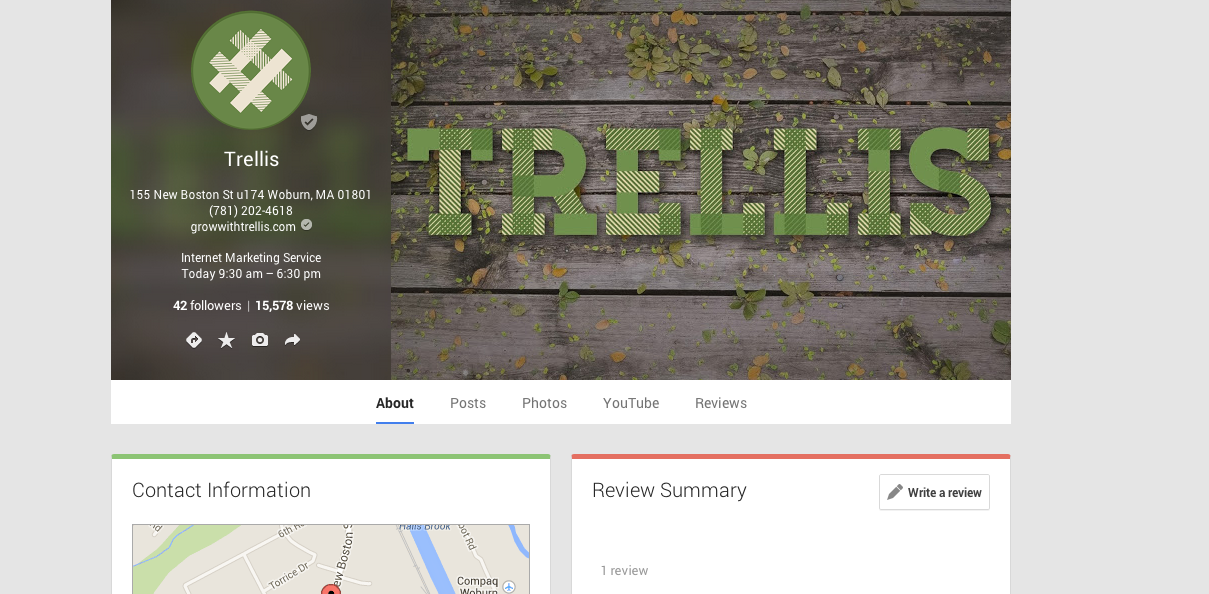
If you have verified your Google Plus page and filled out all the information you should see a check mark on the bottom right of your logo demonstrating you are a verified local business. When you complete the website verifaction process you will also see a check mark next to the url as shown in this screen shot example.
6) Complete Your Google Places Information
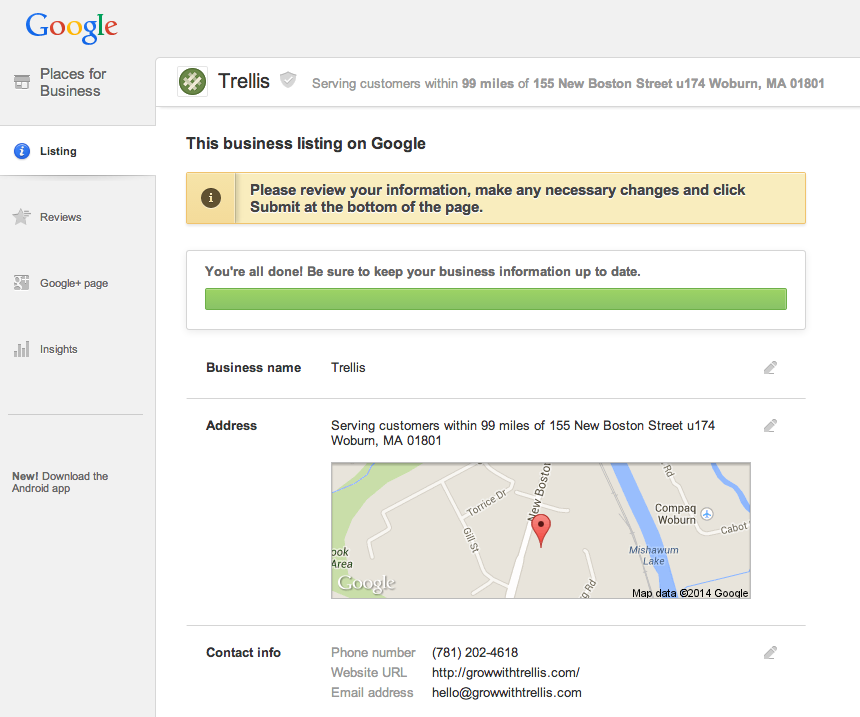
Your Google Plus and Google Places information should be synced but you should login into Google Places to ensure that all the information is accurate and relevant. The information on the Google Places listing is much more in-depth so you should take the time to ensure that every field is filled out properly for maximum local SEO value.
There is a progress bar at the top of the screen on the listing page that will show you how much of the listing is completed and what information you are missing. When that progress bar is completely filled you will know that all your Google Places information is completed as the screenshot shows below:
ScreenCast:
This screen cast gives a live example of creating a Google Plus and Google Places page that are synced together:
Just getting your business started online? Contact us at Trellis for a free consulation on how we can help you grow.
Leave a Comment