Managing Categories in Magento 2
Isaiah Bollinger
Isaiah Bollinger
Categories are essential to building an effective catalog and user navigation so that your customers can easily find the products they want to you in your online store. They are a fairly basic concept, but Magento has a lot of functionality built into the categories so that you can fully maximize the power of categories.
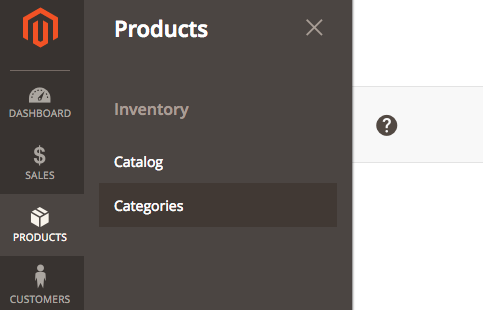
Go to Products => Categories in the admin panel
Magento 2 is different than Magento 1 and the categories can be found in the Products slide out under underneath products. Once in Categories you can add or delete categories as you like.

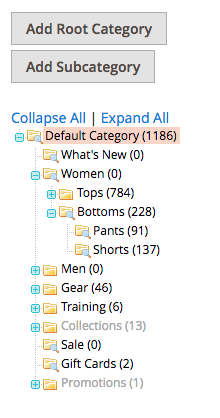
Root Category versus Sub Category
For new comers to Magento, root and sub category may be a bit confusing. Root category is the main category that is associated with a unique store view in Magento so that the main menu is based off this root category for that store. So if you have two websites using Magento’s multi store and multi-website capabilities, you could create two root categories and menu structures so that each website has an entirely different menu. This is very useful for scaling out Magento for multiple brands or for international use.
Sub categories are simply the sub categories or main categories you will use for consumers to find your products such as shoes, shirts, and bags. There is no limit to how many root or sub categories you can have but it will certainly slow down your site if you have thousands of categories, so the more data you have the more you will have to invest in site speed optimization.
Organizing Categories via the drag and drop
The drag and drop tool works just like it did in Magento 1 and is easy to use so that you can quickly organize your categories without any coding expertise. You can drag sub categories underneath or above other sub categories to rearrange your menu.

Currently Active
Currently active is just what you think it is meaning whether the category is active or not. There are three options:
Enable Category: this can be either yes or no so that you can disable categories you no longer want to use or temporarily want to disable.
Include in Menu: This is useful if you want to include in the menu or turn off so that you can keep certain categories out of the main menu but perhaps have them show up in other areas in which you link to them.
Category Name: Simply the name of your category like shoes, shirts etc.

Content
By default the category will show products assigned to a category. However, if you want to add content above the products or add a CMS block you can do that here. You can use the WysiWYg editor to create the content or turn it off to use directly code in the content you want. You can also add a main category image that is meant to be like the featured category image. You will notice most themes like Luma have a design for a featured category image.

Display Settings
Here you can choose how you want the category to display information. There are five main options:
Display Mode: Here you can choose to display products only, static block only, or both products and a static block. This is useful if you have a parent category simply be a window of images and the sub categories be products so in that case one category might be static block only and the other would be products only.
Anchor: Turning anchor to yes turns on layered navigation so that customers can filter via attributes like price, size, color etc on the sidebar.
Available Product Listing Sort By: This lists what is available to sort. You can make new attributes or edit attributes to add new attributes to the sortable list. You can either select all or individually select the ones you want.
Default Product Listing Sort By: This allows you to control what the default product listing sort by attribute is so that you can create the experience you want on each individual category page. Some pages you might want it to be price, and others you may want to do position in which you manually choose which products show up first.
Layered Navigation Price Step: This allows you to control what intervals the price filtering attribute displays. You can have it display in intervals of ten dollars or one thousand dollars, or any increment that makes sense for your business.

Search Engine Optimization
Meta Title: Meta title is the page title that appears above the url of your page in organic search results. This is very important for SEO and should be around 70 character or less.
Meta Keywords: Meta keywords are not longer useful and should be ignored.
Meta Description: The meta description is the description below your url in search results similar to the meta title, that is meant to be around 155 characters or less.

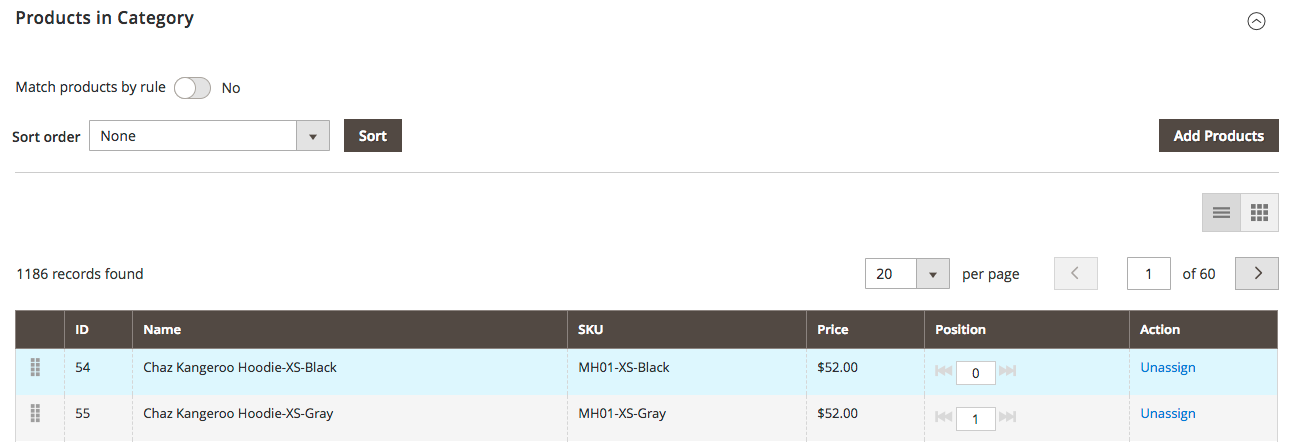
Products In Category
This shows you what products are assigned to the category. You can add new products to the category, Un-assign products, and choose their position.

Design
Use Parent Category Settings: This simply means the category design will follow the design of the parent category if checked to yes.
Theme: This allows you to choose what theme the category layout has, each category could have a different theme in theory.
Layout: This allows you to choose the layout, like one column, two column etc.
Layout Update XML: Here is where you can add additional functionality to the categories via XML.

***
Magento has greatly improved their documentation for Magento 2 and they also have great content on how to manage categories as well.
Leave a Comment